Building a Sturdy Plywood Boat: A Beginner's Guide
Hey there, fellow builders! So you want to build your own plywood boat? Awesome! It's a rewarding project, and while it might seem daunting, with a little planning and the right approach, you can absolutely build a sturdy, seaworthy vessel. This guide will walk you through the process, making it easier than you think.
Planning Your Plywood Boat Project
Before you even think about cutting wood, you need a plan. This isn't rocket science, but it's crucial for success.
Choosing Your Design
There are tons of free plywood boat plans available online. Search for "free plywood boat plans" and you'll find everything from simple canoes to more complex designs. For beginners, I recommend starting with a simple design like a small dinghy or a kayak. Don't bite off more than you can chew!
Gathering Your Materials
You'll need:
- Marine-grade plywood: This is essential! Regular plywood will rot and fall apart in the water. Look for exterior-grade plywood rated for marine use.
- Epoxy resin and hardener: This is your glue and sealant. It's vital for waterproofing the boat.
- Fiberglass cloth: This adds extra strength and waterproofing to your boat.
- Wood screws (stainless steel): These will hold your boat together.
- Wood filler:
- Sandpaper (various grits): For smoothing out the surfaces.
- Paint or varnish (marine-grade): To protect the wood from the elements.
- Measuring tape, pencil, saw (circular saw or jigsaw are great), clamps.
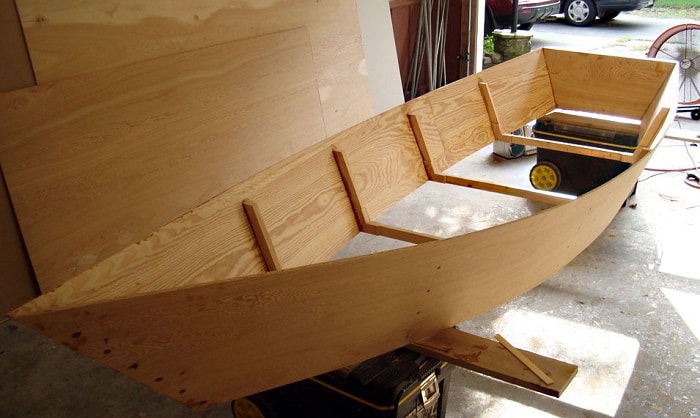
Building Your Plywood Boat: Step-by-Step
Once you have your plans and materials, it's time to get building! Remember to follow your chosen plans meticulously.
Cutting the Plywood
Carefully cut the plywood pieces according to your plans. Take your time and make accurate cuts. A sharp saw will make a big difference.
Assembling the Hull
This is where the epoxy comes in. Follow the manufacturer's instructions carefully when mixing the epoxy and hardener. Apply a generous amount of epoxy to the edges of the plywood pieces and clamp them together securely. Allow the epoxy to cure completely according to the instructions.
Adding Fiberglass
Once the hull is assembled and the epoxy has cured, apply layers of fiberglass cloth over the entire surface. This creates a strong, waterproof seal. Again, follow the epoxy instructions carefully.
Finishing Touches
Once the fiberglass is cured, sand down any rough edges and fill any gaps with wood filler. Then, apply your chosen marine-grade paint or varnish for protection.
Testing and Launching Your Boat
Before launching, perform a thorough inspection. Check for any leaks or weaknesses. Start with a test run in calm water. Gradually increase the difficulty of the conditions as you gain confidence in your boat's stability.
Safety First!
Always wear appropriate safety gear, including eye protection and gloves when working with power tools, epoxy, and fiberglass. Never work alone and follow all manufacturer's instructions carefully.
Commonly Asked Questions
Here are some frequently asked questions about building a plywood boat:
- Q: How long does it take to build a plywood boat? A: It depends on the size and complexity of the design, your experience, and the time you can dedicate to the project. A simple boat might take a few weekends, while a more complex design could take several weeks or even months.
- Q: How much does it cost to build a plywood boat? A: Costs vary depending on the size and materials used. Expect to spend a few hundred to several thousand dollars, depending on the project.
- Q: Do I need any special tools? A: A circular saw or jigsaw, clamps, and measuring tools are essential. A good quality set of sandpaper is also highly recommended.
- Q: What if my boat leaks? A: Proper use of epoxy and fiberglass should prevent most leaks. If a leak occurs, you can usually repair it with additional epoxy and fiberglass.
Happy building!

0 comments:
Post a Comment