Homemade Duck Boat Plans for Hunting in Rivers and Lakes
Building your own duck boat offers a unique sense of accomplishment and allows you to tailor it perfectly to your specific hunting needs. This guide provides detailed plans and instructions for constructing a reliable and effective duck boat suitable for hunting in rivers and lakes.
Choosing the Right Design
The first step is selecting a design that fits your hunting style and the water conditions you'll encounter. Consider the following factors:
- Size: A smaller boat is more maneuverable in tight spots, while a larger boat provides more stability and space for gear.
- Hull shape: A flat-bottomed hull is ideal for shallow water and mud, while a v-shaped hull offers better handling in choppy water.
- Material: Aluminum is lightweight and durable, while plywood is affordable and easy to work with. Fiberglass provides exceptional strength and water resistance.
- Power: Decide whether you need a motor or prefer to use paddles or a push pole.
Materials and Tools
Gather the necessary materials and tools before you start building:
Materials
- Plywood or aluminum sheets (depending on your chosen hull material)
- Wood or aluminum framing (for the hull and seating)
- Fasteners (screws, rivets, or bolts)
- Epoxy resin and fiberglass cloth (if using plywood)
- Paint or marine varnish
- Duck blinds (if desired)
- Hardware (hinges, cleats, etc.)
- Motor (if needed)
- Propeller and shaft (if using a motor)
- Steering wheel and cables (if using a motor)
Tools
- Saw (circular saw, jigsaw, or band saw)
- Drill and drill bits
- Screwdriver
- Measuring tape
- Level
- Clamps
- Sandpaper
- Paintbrush
- Safety gear (gloves, goggles, and ear protection)
Building the Hull
The construction process varies depending on the hull material. These steps provide a general overview:
Plywood Hull
- Create templates: Design your hull shape on paper and transfer it to plywood using a pencil or marker.
- Cut the hull panels: Use a saw to cut the plywood panels according to your templates. Ensure accurate measurements for a smooth fit.
- Assemble the hull: Secure the panels together using screws, rivets, or epoxy resin. Make sure all joints are tight and flush.
- Apply fiberglass: Lay fiberglass cloth over the hull and coat it with epoxy resin. Repeat this process until you have a strong, watertight hull.
- Sand and finish: Sand the hull smooth after the epoxy has cured. Apply paint or marine varnish for protection and aesthetics.
Aluminum Hull
- Cut the aluminum sheets: Use a metal shear or a jigsaw to cut the aluminum sheets according to your design.
- Bend the aluminum: Use a brake or a metal bending tool to shape the aluminum panels into the desired hull form.
- Assemble the hull: Rivet the aluminum panels together, ensuring overlapping seams for watertightness.
- Seal the joints: Use a sealant or a welding process to create a watertight seal on all joints.
- Paint or anodize: Apply paint or anodize the aluminum hull for protection and a polished appearance.
Constructing the Interior
After completing the hull, focus on building the interior:
- Add framing: Install wood or aluminum framing for seating, storage compartments, and other internal structures.
- Create seating: Build comfortable seating using plywood, foam padding, and upholstery material.
- Install storage compartments: Incorporate storage compartments for hunting gear, tools, and other essentials.
- Add duck blinds (optional): If you want to conceal yourself while hunting, build duck blinds using camouflage material and sturdy supports.
Installing the Power Source
Choose the power source that best suits your needs:
Motor Installation
- Mount the motor: Attach the motor to the transom using brackets and bolts. Ensure it's securely mounted and properly aligned.
- Connect the steering: Install steering cables and a steering wheel to control the motor from the cockpit.
- Install the propeller: Attach the propeller to the motor shaft and ensure it's securely fastened.
Paddle or Push Pole
If you prefer paddling or using a push pole, ensure your boat is designed with appropriate oarlocks or a push pole mount. Consider adding a small platform or a bench for standing while using a push pole.
Finishing Touches
To make your homemade duck boat truly unique and functional:
- Add hardware: Install cleats, hinges, and other hardware to enhance the boat's functionality.
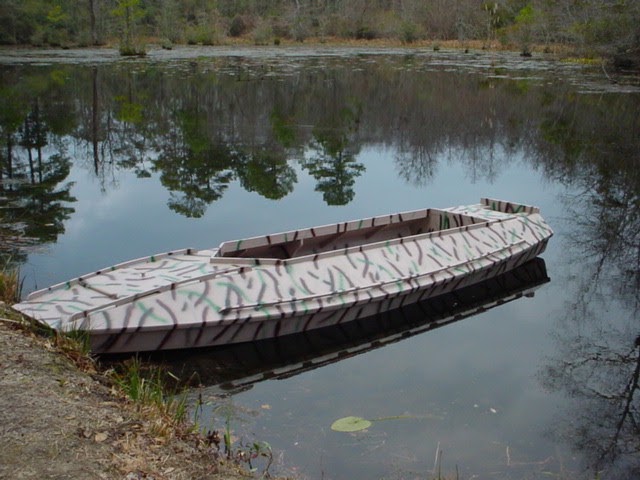
- Apply camouflage: Camouflage the boat using paint, camo netting, or other materials to blend in with the environment.
- Install lighting: Add navigation lights if you plan on using the boat at night.
- Test and adjust: Take the boat out for a test run and adjust any components as needed to ensure it performs optimally.
Safety Tips
Always prioritize safety while building and using your duck boat:
- Wear safety gear: Use gloves, goggles, and ear protection when working with tools.
- Use sturdy materials: Choose high-quality materials that can withstand the rigors of hunting and water conditions.
- Follow all instructions: Carefully follow the instructions for your chosen design and ensure all joints are secure.
- Test the boat thoroughly: Test the boat in a safe environment before using it for hunting.
- Wear a life jacket: Always wear a properly fitted life jacket when on the water.
- Be aware of weather conditions: Check the weather forecast and avoid hunting in dangerous conditions.

0 comments:
Post a Comment